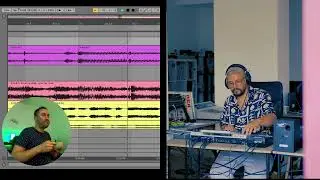
MPC Tricks - Remove Drums from Samples Easy
0:00 Intro
If you are after sustained Pads or Synths when you sample... this might be a good solution for you.
Let me show you how it works!
01:04 1.Find your Sample
STEP 1
Find your sample and immediately identify Kicks and Snares. This trick works with any type of percussion but for this example we are just going to do Kicks and Snares. My sample will be the intro of the track you see on the screen. Very cool funky vibes with lots of strings and I kind of like the hats. This is Sir John Roberts, name of the track is Do You Believe in Fate. I already downpitched the sample to prevent copyright XD
02:11 2. Chop your Sample in Quarter Notes
STEP 2
Chop your sample in Quarter Notes. If you want to get this done easy please check my video on how to do it ( • MPC Tips - Chopping Up Quarter Notes ). You should end with chops that sound like this. Kick/Snare/Kick.Snare.
With this little trick we are going to clean all that by just using a know that affects all the slices. Create a program with PAD Parameters when you are ready.
03:17 3.Set a Filter Envelope
STEP 3
Go to program Edit and select ALL samples. What we are going to do must affect all samples. Got to the Envelopes section and find the Filter Section. AKAI recently redesigned the looks and layout of this section but in terms of functionality everything remains the same.
Now select Filter LOW1 and set the Cutoff to 0. If you play the pads you will only hear the lows. But this is where it gets interesting. Find the parameter called Depth and set it to 127. Once you do that you will notice it sounds like you pretty much didnt apply any filters at all. Start playing with the Attack and Decay values of that same screen (the Filter Envelope).
05:29 4. Adjust to Taste
STEP 4
Set the right Attack and Decay for all pads or do this to each pad individually. The filter Envelope is basically letting only the Low frequencies pass. If you go for LOW2 or LOW3 as your filter, the effect will be more dramatic. So you can also play with that. The decay value will help you clean the end of the sample. If you couldn't clean your samples on step 2, play with the Decay so it cleans mid and high frequencies at the very end of the sample.
If the low frequencies of the Kick are too punchy because the Kick of the sample is really loud, go to the Amplitude Envelope and increase the Attack value till you stop hearing that boomy sound you dont want. A compressor could also be a good alternative in case you have this issue.
08:25 5.Conclusion
CONCLUSION
So just remember you can use Filter Envelopes to remove Highs or Lows from your chops. The steps are: Create a Program with Kick and Snares on your pads, Select All the pads, Filter LOW1, Cutoff 0, Depth 127 and play with the Attack, Decay and shape of the Filter Envelope.
09:09 6.Beat
A beat where I replaced kicks, snares and hats with my own, plus some additional synth layers.
I hope you find it useful and I wil see you in the next one!
#akaipro #mpc #jorgecds
🎸 LISTEN TO MY MUSIC ON SPOTIFY:
https://open.spotify.com/album/0PzwYR...
🎬 WATCH ME LIVE ON TWITCH:
/ jorgecds
📺 FOLLOW ME:
/ jorgecds
/ jorgecdsmusic
/ diezdesollano
Thanks for watching! Hope you enjoyed this video!
_____________________________________
ABOUT MY GEAR:
Akai Mpc One:
Novation Launchpad X
Focusrite Scarlett 4i4
Hyperx Quadcast
Daw: Ableton Live 10


